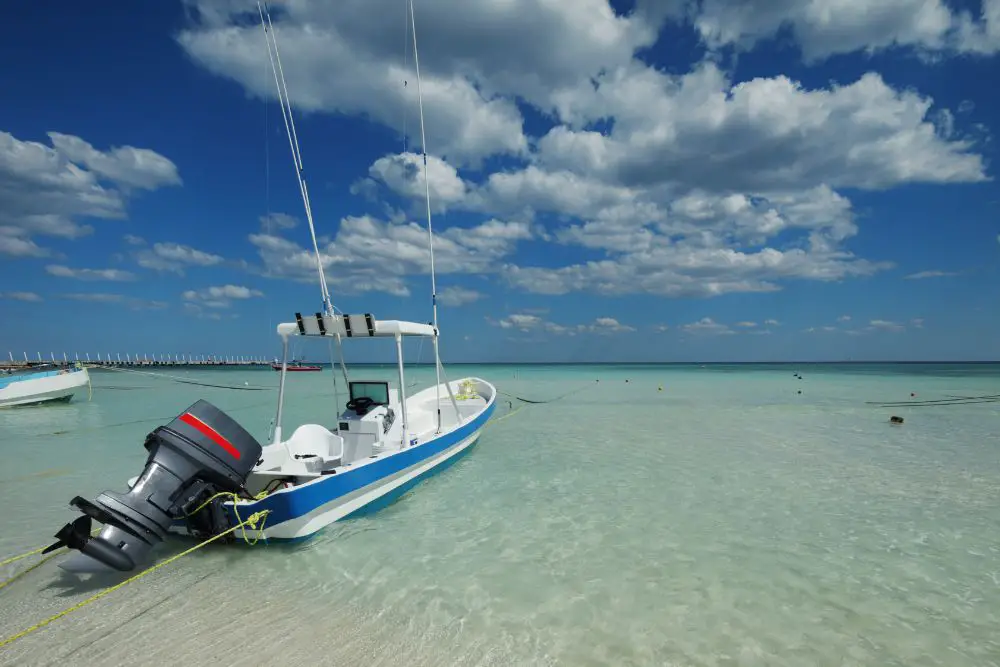
A kill switch is an essential part of any boat’s safety equipment. It is designed to shut off the engine in the event of a collision or other emergency, preventing the boat from running out of control. However, there are times when you may need to bypass the kill switch in order to restart the engine.
- What Is a Kill Switch?
- Why Would You Need to Bypass the Kill Switch?
- How A Killswitch Works and Why Are They Important?
- Methods For Bypassing A Kill Switch
- Method 1: Fashion A New Lanyard & Connector
- Method 2: Bypass The Kill Switch At The Switch
- Method 3: Bypass The Kill Switch At The Motor
- Method 4: Use A Remote Starter
- In Conclusion:
What Is a Kill Switch?
A kill switch is a safety device that is installed on boats to prevent the engine from being started accidentally or turned on if the boat is not in proper working order. The kill switch is usually located near the steering wheel and is connected to the ignition system so that it can be easily turned off in an emergency.
Why Would You Need to Bypass the Kill Switch?
There are a few reasons why you might need to bypass the kill switch on your boat. For example, if you collide with another boat and the kill switch is triggered, you may need to bypass it to restart the engine and get back to shore. Or, if you are having trouble starting the engine, you may need to bypass the kill switch in order to troubleshoot the problem.
How A Killswitch Works and Why Are They Important?
Most kill switches work by interrupting the flow of electricity between the boat’s battery and the ignition system. In order for the engine to start, electricity must flow through the kill switch, which is usually located on a lanyard that attaches to your life jacket. If you fall overboard and the lanyard pulls away from the kill switch, the circuit is opened, cutting power to the engine and preventing it from starting.
While this may sound like a nuisance, it’s actually a very important safety feature. If you were to fall overboard without a kill switch, the boat would continue moving forward without anyone at the helm. This could easily lead to a collision with another vessel or object, resulting in serious injury or even death.
Methods For Bypassing A Kill Switch
You can use several methods to bypass a kill switch on a boat. We’ll go over four of the most common methods below.
Method 1: Fashion A New Lanyard & Connector
A kill switch is an important safety feature on a boat, and for a good reason. In the event of a collision or other accident, the kill switch will cut off the engine and prevent the boat from running out of control. However, there are times when the kill switch may be damaged or lost, and you’ll need to know how to bypass it. With a few simple tools and some know-how, you can fashion a new lanyard and connector that will get you back on the water in no time.
Step 1: Make Sure Your Kill Switch Works
Before you start bypassing your kill switch, it’s important to make sure that it’s actually the kill switch that’s the problem. If your engine doesn’t start, there could be any number of reasons why. Check all your connections and ensure everything is plugged in correctly. If your kill switch is working properly, it should cut off the engine as soon as you disconnect it.
Step 2: Fashion A Makeshift Connector
If your kill switch is the problem, you’ll need to fashion a new connector. You can do this with a length of heavy-duty wire or a strong piece of string. Simply tie one end of the wire or string around the ignition key and the other end around the kill switch. This will bypass the kill switch and allow you to start your engine.
Step 3: Replace Those Lost Connectors
Once you’ve started your engine, it’s time to replace those lost connectors. You can buy new connectors at most boating supply stores. Just be sure to get ones that are rated for marine use; regular electrical connectors will corrode quickly in salt water. With new connectors in hand, simply connect the ignition key to the kill switch, and you’ll be back in business.
Method 2: Bypass The Kill Switch At The Switch
A kill switch is a vital safety feature on a boat, but sometimes it can be more of a hindrance than a help. If you’re experienced with boats and know how to troubleshoot electrical issues, bypassing the kill switch at the switch is a relatively easy process.
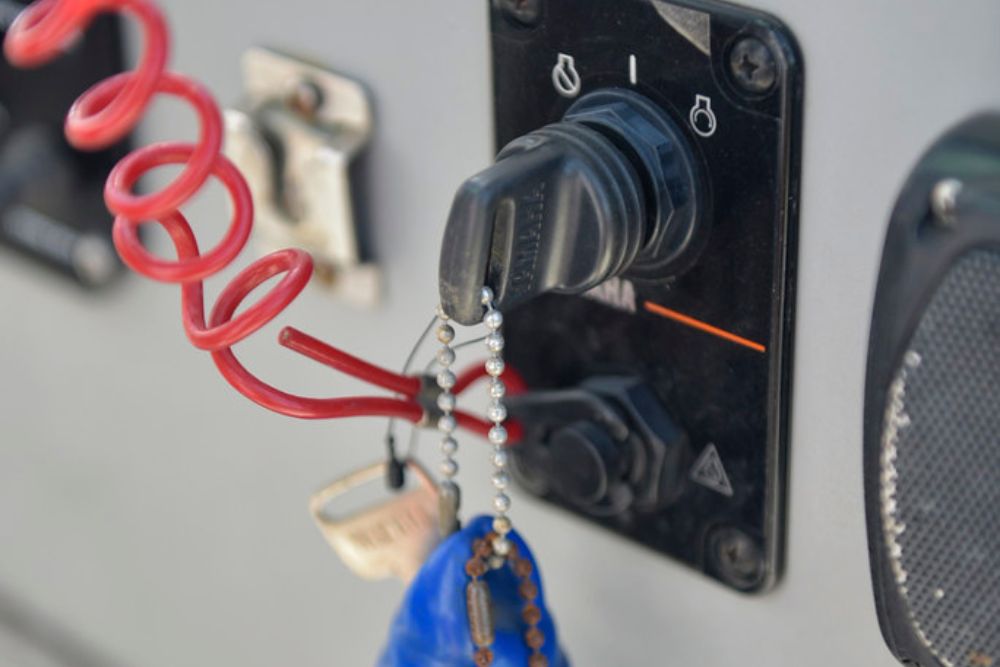
Step 1: Locate The Kill Switch
The first step is to locate the kill switch. It will most likely be located near the engine, on the dashboard, or on the steering column. Consult your boat’s owner’s manual if you’re unsure where it is.
Step 2: Remove The Kill Switch
Once you’ve found the kill switch, you’ll need to remove it from its mounting location. This is typically done by removing a few screws or bolts. Be sure to keep track of all the hardware so you can re-install it later.
Step 3: Check The Kill Switch Wiring
Once the kill switch has been removed, take a look at the wiring. In most cases, there will be two wires going to the switch–one power wire and one ground wire. The power wire will usually be red, while the ground wire will usually be black.
Step 4: Disconnect The Kill Switch
With the kill switch removed and the wiring exposed, you’ll need to disconnect one of the wires going to the switch. It doesn’t matter which one you choose–power or ground–as long as only one of them is still connected.
Step 5: Start The Motor Or Change The Wires
Now it’s time to start up the engine and see if your bypass worked. If not, then you’ll need to reconnect both wires and try again. If your boat still doesn’t start, there may be an issue with the wiring or something else entirely. Consult a professional mechanic for further diagnosis and repairs.
Method 3: Bypass The Kill Switch At The Motor
Another way to bypass a kill switch is to do it at the motor. This is a bit more involved than bypassing the switch itself, but it’s still a relatively easy process.
Step 1: Remove Your Engine’s Cowling
The first step is to remove your engine’s cowling. The cowling is the protective cover over the engine. You will need a screwdriver to remove the screws that hold the cowling in place. Once you have removed the cowling, you should be able to see the engine and all of its wiring.
Step 2: Find The Kill Switch Circuit Wire
The kill switch circuit wire will be clearly labeled. It is usually a red wire. Once you have found the wire, follow it back to where it is connected to the engine’s ignition system.
Step 3: Disconnect The Kill Switch Circuit
To bypass the kill switch, you will need to disconnect the kill switch circuit from the ignition system. You can do this by unscrewing the connector that attaches the two systems or by cutting the wire with a pair of wire cutters. Once you have disconnected the kill switch circuit, you should be able to start your engine without any problem.
Method 4: Use A Remote Starter
The last way to bypass your killswitch is by using a remote starter. This will let you bypass all the console electronics, such as the starter and the kill switch. The downside to this method is that it won’t isolate a problem specific to one piece of electronics.
Step 1: Remove The Engine Cowling
The first step is to remove the engine cowling. This will give you access to the engine compartment.
Step 2: Locate The Engine Harness
Once you have access to the engine compartment, locate the engine harness. This is usually located near the base of the engine block.
Step 3: Connect The Remote Starter
The last step is to connect the remote starter. This will bypass the kill switch and allow you to start the engine.
In Conclusion:
Bypassing a boat’s kill switch is a relatively simple process that anyone can do. However, it’s important that you only bypass the kill switch when absolutely necessary, as it is there for your safety. If you have questions about how to bypass a kill switch on a boat or need help with any other boat repairs or maintenance tasks, be sure to contact your local marine mechanic.